Ready in 30 minutes or less (with a make-ahead dessert!) this Asian-themed weeknight meal is quick, easy and super tasty!
Pork Lettuce Wraps
An excellent appetizer or light lunch, these wraps are super easy to make and incredibly impressive!
Beef Teriyaki Bowl
Better than any teriyaki you've had before, the beef is super tender and delicious served over rice!
Make-Ahead Lemon Squares
What can be more refreshing than lemon bars in the spring?
Monday, May 23, 2011
Friday, May 20, 2011
Product Review: Chebe Cinnamon Rolls
As you know, Glutenfreeda has been a long-time supporter of Chebe products - back when there was only the single, basic bread mix. Now, with a full line of mixes and frozen par-baked goodies, Chebe continues to impress with Focaccia, Breadsticks and Cinnamon Rolls.
Ingredients: Manioc (tapioca) flour, modified manioc starch (100% manioc), evaporated cane juice, cinnamon, iodine-free sea salt.
Like all of their mixes, the cinnamon rolls come together in just minutes! Just add oil, an egg, applesauce and a little bit of milk or soymilk, roll it out and you're set! If you want to include nuts or raisins, you easily can, and if you don't, they're delicious as-is.
While the dough puffs up considerably and looks flaky, I felt like the sticky buns were mostly...bun. As the dough expanded, space was created between each layer, forming a sort of pastry rosette, with most of the filling leaking out onto the bottom of the pan. Still delicious (and significantly better warm!) but not quite the same as a traditional cinnamon roll.
As soon as they start the cool, the buns become fairly chewy and a little bit dry - much like the standard bread rolls. But just pop them in the microwave for a few seconds and they are warm, moist and delicious once again.
Available nationwide, across Canada and in Puerto Rico.
Friday, April 29, 2011
Product Review: Fosse Farms' Dressings & Marinades
Visit Fosse Farms Inc. for more information!
Elaine Fosse began making salad dressings in 1987 because she was dissatisfied with the current market offerings - and I can't tell you how happy I am! Certified gluten free, soy free, dairy free, salt free, vegan and free of additives and preservatives, Elaine's line of dressings are healthy and delicious.
With an ingredient list that reads "Pure Olive Oil, Cranberries, Vinegar, Sugar and Herbs" how can you go wrong? It is my understanding that as many ingredients as possible are produced on the farm, including the vinegar and berries, and Elaine sources her olive oil from California - creating a local and sustainable product grown and produced using West Coast ingredients.
While I had the luxury of trying all of Fosse Farms' fabulous dressings, my personal favorite was the extra-garlic Blackberry -- lightly sweet, tangy and with a garlic taste that was pungent without being overwhelming. We loved it on spinach salads with goat cheese and walnuts, as a marinade for barbecued chicken, and as an interesting way to add an extra kick to your sandwich. Definitely a new favorite!
Flavors Available:
- Raspberry (also organic)
- Cranberry (also organic)
- Marionberry
- Blackberry (also organic)
- Blackberry with extra garlic (my favorite)
- Organic Provencal
Available in-store and at farmer's markets across Western Washington and Northeast Oregon and of course online, Fosse Farms dressings are most easy to find at Whole Foods.
Friday, April 22, 2011
Product Review: Jones Mock Salt
You may be thinking "Oh, just another salt-free seasoning alternative..." but that's where you're wrong! Jones' Mock Salt is a super delicious no-sodium seasoning blend that is gluten free, organic and produced in the Pacific Northwest. June Jones developed the seasoning over the past several years in an effort to help family and friends who suffer from heart conditions which require limiting sodium intake - and what a success!
With a fine texture and complex flavor, what could be better? This seasoning blend is anything but bland and includes a few surprises - like orange peel - which creates a subtle blend of flavors that packs a big punch and lingers on the palate.
For sure, Jones' Mock Salt is my favorite seasoning blend!
Thursday, April 14, 2011
Product Review: The Good Cookie(s)
If you like (or love) oatmeal cookies, the Good Cookies are right up your alley! All five flavors are gluten free/dairy free, delicious and pretty good for you too! Sold by the dozen, they are baked fresh and are the perfect combination of soft 'n chewy + crunchy cookie awesomeness. Not excited yet? Just keep reading...
Flavors: "Pure and Innocent" (Peanut Butter & White Chocolate Chip), "Rais'n Shine" (Good ol' Oatmeal Raisin), "The Choc-o-holic" (Double Chocolate with Chocolate Chips), "Goodie Goodie" (Cranberry & White Chocolate Chip) and their signature, "The Good Cookie" (Peanut butter Chocolate Chip)
Overall Score - 4/5 stars
Taste
Becky: First, go buy a quart of milk (if you don't already have some). Second, pour yourself a large, ice cold glass. Next, open your package of The Good Cookies, and just start eating. Trust me, you will be in cookie heaven. The taste of each and every of the five flavors of cookies are so unbelievably delish. My personal favorites? The Choc-o-holic, and the "Goodie Goodie" (Cranberry White Chip). All the flavors do have an overtone of peanut butter flavor (it's used in all the cookies - beware, those who are allergic), but it's not overpowering - except in the Peanut Butter and White Chip flavor, where it's the main attraction! - and honestly, all have unique enough personalities that the common ingredient makes no difference. OH yeah - these are called "GOOD" for a reason!
Kelsey: As someone who never liked oatmeal raisin cookies (in fact, I avoided them like the plague as a child) I was awed by these cookies. I wasn;'t totally in love with the general peanut-buttery taste, but it definitely does not detract from the five distinct flavors and isn't pronounced unless you a) eat all of them in one sitting (which I definitely did not do... at all... stop looking at me like that!) or b) are on the lookout for those nutty undertones. My favorite? The straight up Rais'n Shine and the Choc-o-Holic - yum!
Texture
Becky: Homemade. Need I say more? Okay, yes, I'd better, because I feel like rhapsodising for a moment. These cookies have the soft and tender crumb I've been working so hard for in my own kitchen since I was a child. Each cookie is firm enough to not fall apart, yet delicate enough to literally melt in the mouth. Oatmeal, along with peanut butter, is another common ingredient, and for me that adds a nice element of interest. I also feel far less guilty eating these cookies (okay, okay, gorging on them, just keep it quiet) because I can convince myself that they're healthier for me! I kept thinking I'd like to make ice cream cookie sandwiches with these, and the texture is definitely right for that use: soft and moist, yet firm enough to withstand a little melted ice cream. Additionally, it's important to note that I kept these cookies in my freezer until review time (moment of truth - I ate a bunch before putting them there) and they lasted like a dream with no issues.
Kelsey: The only thing stopping you from believing that you baked these amazing cookies yourself is that your kitchen is not perfumed with the aroma of freshly baked cookies and they aren't quite fresh-from-the-oven-warm, but really, that's it. They're just like homemade (because they are) and as far as I'm concerned, that's a win right there. They're just the right amount of soft & chewy and crunchy-cookie, perfect for light dunking, straight-up devouring or whatever else you could think to use them for.
Storage
Becky: I felt like my Aunt Irma and Uncle Ollie had arrived for a visit when these cookies showed up on my doorstep. You see, they always brought these really delicious baked goods from a bakery near their house, and I always looked forward to tearing open the tissue paper to see what goodies they'd brought. The box arrived from The Good Cookies, and lo and behold, inside were two lovely bakery boxes. And inside the bakery boxes? Jaunty pink tissue paper. And inside the paper? Neatly packaged cookies, with really cool stickers detailing the contents, ingredients, and all the other necessary information. I've previously divulged that I tucked into a bunch of cookies before freezing them, so some of the plastic wrappers were opened already. Guess what? It didn't matter to the freshness of the cookies at all - they stayed fresh as the day they were baked, and as tasty, too. The only thing I'd hope to see happen in the future is a resealable wrapper, for those who aren't gluttonous like me. Who needs to worry about storage, though, when these won't really last that long anyway?!
Kelsey: Bakery boxes. Pink tissue paper. What else do you need?! Oh, right, cookies. So of the remaining half that I didn't inhale (ahem), I put a few in a ziploc-type bag in the freezer, a few just in a baggie on the counter and left the rest in their unsealed cellophane wrapper (blasphemy, I know) and guess what? They all held up almost equally well. The freezer didn't work for me at all because when I want a cookie, I am not about to wait for it to slowly and delicately defrost but I also recognize the horrors of microwaving a frozen cookie (or at least, I do now!), and while those in the sealed baggie did stay fresh after two weeks (my mandatory waiting time for baked goods), those left in the opened cellophane held up remarkably well. Obviously you probably won't just leave them out the way I did, but even if you do, they'll stay pretty darn fresh for at least a week. Wowza!
Availability
Becky:
The Good Cookies website offers all the cookie flavors, sold by the dozen. They may also be found in various stores in the Los Angeles, CA area (including Malibu), and two stores on Long Island, NY. Hopefully word will spread (I've already started alerting my local stores) because these are a worthwhile addition to the gluten free bakery section of any market. Oh, heck - they're a worthwhile addition to ANY section - unqualified - of the baked goods aisle!
Cost
On the website The Good Cookies sell for $8 per dozen. I think that for the home-baked quality and gorgeous custom packaging of these delectable (and generously sized) cookies, that's a pretty decent deal at sixty-seven cents per cookie! Shipping always adds more to the cost, if you are unlucky enough to not live in L.A. or Long Island, so be sure to budget for the added expense. Overall, definitely one of the most cost-efficient gluten free cookies I've tested to date. And well worth it!
Wednesday, April 13, 2011
GFCF Weekly Roundup: Orange Almond Cake
Also our GFCF feature for the month, this recipe is perfect for spring when most citrus fruits are just past their peak and are no longer quite at their peak. The almond meal is super healthy, low glycemic and low carb, and the only fat is from the delicious and heart-healthy olive oil - yum!
The olive oil keeps the cake moist (perfect for leftovers) and is sweet enough for dessert, but not so unhealthy you couldn't enjoy some for breakfast or brunch. By grinding your own almonds into a meal, you can control both the texture and certify that the product is 100% gluten free.
Serving Suggestions
Ganache or chocolate glaze, Sabra glaze (orange-chocolate liqueur), confectioner’s sugar. Honestly, our house isn’t huge on super-sweet desserts and we love it plain. Next time, I’ll probably press sliced almonds into the top of the cake half-way through baking for a more elegant appearance.
For storage, keep at room temperature and cover tightly with plastic wrap to maintain moisture. This cake improves with age and is best on its second or third day.
Orange Almond Cake
Serves 4-6
1 small/medium orange*
1 lemon*
6 ounces whole almonds**
1 cup gluten free flour (like Jules Gluten Free Blend)
1 Tbsp baking powder
4 large eggs (or 5 medium), at room temperature
1/2 tsp salt
1 1/2 cups sugar
2/3 cup olive oil (the higher quality the oil, the better)
Confectioner’s sugar, for serving (optional)
First things first, get started on preparing the citrus. Put the orange and lemon in a saucepan and fill with enough water to cover. They’re going to float, don’t worry about it. Bring to boil over medium-high heat, then reduce heat and simmer for 30 minutes. Drain and set aside to cool.
In the mean time, preheat the over to 325F (one rack in the center) to toast the almonds. Distribute the almonds on an ungreased sheet pan and bake for 10-15 minutes until they look golden and smell all roasty and delicious. Err on the side of over-toasted, just make sure they don’t burn! Let them cool completely, (I dumped mine out onto a tea towel to expedite the process) then toss ‘em in the food processor until finely ground, like corn meal. Set aside and don’t worry about cleaning out the food processor.
Bump the oven temperature up to 350F and grease a 9 or 10-inch springform pan. The baking time will differ depending on which size you choose/have on hand.
When the fruit has cooled, cut the lemon in half and scoop out the pulp and seeds; discard. Cut the orange in half also and remove the seeds, leaving pulp in tact. Put the lemon rinds and orange halves in the food processor and chop until they form a really coarse paste.
Meanwhile, combine flour and baking powder in a small bowl.
In a mixing bowl or the base of a stand mixer, combine eggs and salt, then beat until foamy. Gradually beat in sugar. If using a stand mixer, switch to the blade attachment, stir in the flour/baking powder mixture. Beat in (on low speed) the fruit, almonds and olive oil, until just incorporated, but be careful not to over mix! Pour batter into springform pan and bake until toothpick comes out clean: 45-60 minutes for a 9-inch pan, 30-40 for a 10-inch pan.
Remove from oven and cool in the springform pan on a wire rack (I used the stovetop of my gas range– you just need circulation to facilitate quicker cooling). Remove the sides of the pan (by far, my favorite aspect of using the darn things) and serve.
Notes
* Because you are eating the whole fruit, rind and all, if possible, use organic fruit.
** You can substitute pre-roasted almonds but it turns out so much better with freshly toasted almonds.
Tuesday, April 12, 2011
Recipe of the Week: Almond-Stuffed Prunes Wrapped in Bacon
Also known as "Devil's on Horseback" (don't ask me why), bacon wrapped prunes (or dates) are a delicious and elegant appetizer! The sweet and salty flavors compliment each other well, the crunchy bacon, soft and juicy prunes and chewy almond create an interesting texture combination that will please all of your dinner guests!
Almond-Stuffed Prunes Wrapped in Bacon
1/2 pound large pitted prunes
2 ounces blanched whole almonds
Thin, lean bacon
Preheat oven to 400 degrees F.
Stuff each prune with an almond. Cut each strip of bacon in three equal pieces. Wrap a piece of bacon around each stuffed prune and secure with a round toothpick.
Bake on a foil lined baking sheet for about 15 minutes or until bacon is crisp.
Serve immediately.
Tips
These are best when made with very thin bacon.
Related Recipes...
Blueberry Almond Coffee Cake
Meatballs with Almond & Garlic Sauce
Pan Seared Red Potatoes, Snow Peas, Cilantro Vinaigrette with Almond Crusted Chicken
Monday, April 11, 2011
Menu Monday: Quick Springtime Weeknight Meal
Enjoy the fresh flavors of spring and splurge on local produce with this quick and easy menu! What says spring like fresh asparagus and a meringue pie?
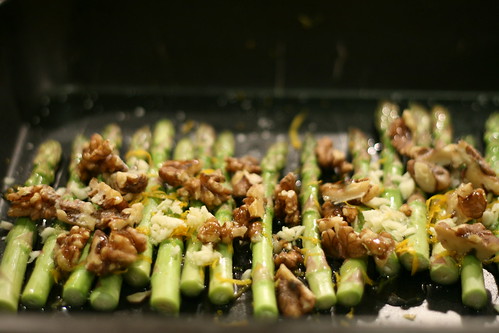
Asparagus Salad with Toasted Walnuts
Buttermilk Mashed Potatoes
Seared Tenderloin with Prosciutto, Provolone & Mushrooms
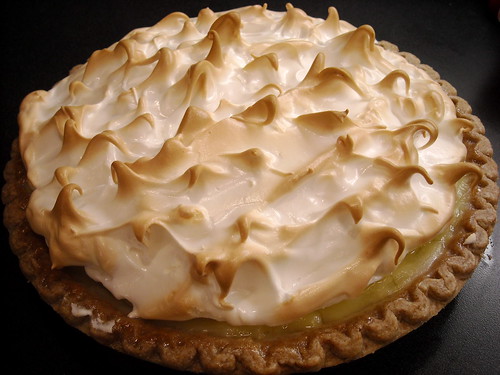
Lime Meringue Tart
Photos by Missy and the Universe and Sistak.
Thursday, April 7, 2011
Thirsty Thursday: Saffron-Limoncello Shandy
While you may be thinking that cider is only an autumnal treat, you would be soo wrong. First of all, in Early America, cider was the beverage of choice over ale and wine, and definitely instead of mostly-toxic water. Because it was fermented, there wasn't a risk of food borne illness and it would keep for months (versus fresh juice which, without refrigeration, lasted a few hours). In any case, as a young adult with Celiac who tries to make it a habit of being social, coming up with easy, readily available and relatively inexpensive alternatives to beer is a serious challenge - and thus, I discovered hard cider. Strongbow (imported from England) is my brand of choice because it's a dry cider and therefore not very sweet - perfect for a refreshing spring mixer.
Saffron-Limoncello Shandy
Inspired by British shandies — beer mixed with ginger ale or sparkling lemonade — this refreshing drink ups the ante with English hard cider and limoncello. - Creator Darren Creely, CafĂ© Nell, Portland, Oregon
1 oz. limoncello
1/2 oz. saffron sryup (see below)
4 oz. gluten free dry hard cider (like Strongbow)
Ice cubes
In a shaker, combine limoncello, saffron sryup and ice. Shake for 30 seconds. Strain into an ice-filled Collins glass. Top with cider and garnish with a lemon twist.
To make the saffron syrup: Combine 1 cup of water, 1 cup of granulated sugar and ¼ tsp. of saffron in a small saucepan. Bring mixture to a boil, stirring to dissolve the sugar and saffron. Remove from heat and chill before using.
Photo by Muffet
Wednesday, April 6, 2011
GFCF Weekly Roundup: Coconut Chicken Soup
One of my favorite things about this recipe (in addition to its refreshing flavor) is that you can set it up the day before. Roast a whole chicken, clean off the extra meat and set aside; boil the carcass with roasted vegetables to make homemade stock and voila - the main ingredients are already there, better tasting and healthier than store bought alternatives - yum!
Coconut Chicken Soup
3 cups gluten free chicken stock (ideally, homemade - see above)
1-inch piece of ginger, peeled and cut into thin disks
1 cup (canned) coconut milk
1 tablespoon fish sauce
2 teaspoons honey or agave nectar
6 ounces cooked (ie leftover) chicken
1 cup mushrooms, cleaned and halved
1 medium carrot, cut into matchsticks
2 tablespoons fresh lime juice
1/4 cup fresh cilantro, minced
In a medium-sized pot, bring chicken stock and ginger to a boil, then reduce and simmer for 5 minutes.
Stir in the coconut milk, fish sauce, sweetener (honey or agave), chicken, mushrooms and carrot sticks.
Just prior to serving, add lime juice and cilantro. Serve.
Photo by Edsel L
Monday, April 4, 2011
Menu Monday: Spring Dinner Menu
Everything about this menu screams "fresh!" and "spring is HERE!"so why not take it for a test drive this week? The crisp apples and creamy gorgonzola make a perfect pair, but instead of being set atop a fresh arugula salad with candied walnuts and a nice vinaigrette (yum...), here they make for bite-sized appetizers perched on crispy garlicky bread slices - oh and for something much quicker, easier (and maybe even a little better...) try using slices of Udi's Bread cut into triangles instead of baking a whole loaf of French bread just for the occasion.
And really, what says spring like these pristine coconut cupcakes?
Bruschetta with Gorgonzola & Apples
Spring Risotto with Artichokes
Chicken with Lemon Shallot Sauce
Coconut Cupcakes
Photo by Jamieanne
Tuesday, March 29, 2011
Recipe of the Week: Chiles Rellenos with Goat Cheese
I know, I know, I've been on a major Mexican/Southwest/TexMex food kick lately, but bear with me - it seems like the perfect kind of cuisine for this time of year. Back in the days before we were diagnosed with Celiac and forced to adopt a gluten free diet, chiles rellenos was one of my favorite restaurant meals, but I never tried to make it at home. Now that dining out is significantly more difficult than cooking at home, this seemed like the perfect recipe to try
Chiles Rellenos with Goat Cheese
Ingredients
8 poblano peppers
1/2 pound mild goat cheese, at room temperature
1/2 pound Monterey Jack cheese, grated
1 Tablespoon fresh parsley, minced
1 Tablespoon cilantro, minced
1 Tablespoon almonds, chopped & toasted
1 teaspoon garlic, minced
2 teaspoons fresh lime juice
1 teaspoon salt
1/4 teaspoon fresh ground pepper
Vegetable oil for frying
1/2 cup Jules Gluten Free flour
3 large eggs, separated
1/4 teaspoon salt
Directions
Place peppers on a baking sheet and set oven on broil. Broil peppers until skins char. Turn peppers until skins are blackened all over.
Remove peppers to a bowl and cover with plastic wrap for 15 minutes. Remove charred skins and make a slit in each pepper leaving stems in tact. Carefully remove and discard seeds.
In a bowl, mix together goat cheese, jack cheese, parsley, cilantro, almonds, garlic, lime juice, salt and pepper.
Divide mixture into 8 equal portions and stuff into peppers.
Heat about 3/4" of oil in a large heavy skillet over high heat until temperature reaches about 375 degrees F.
Place flour on a plate and set aside.
Using an electric mixer beat egg whites and salt until they hold stiff peaks. Add 1 tablespoon flour and yolks, one at a time, beating in between each egg yolk.
Dip each stuffed peppers into flour and then into egg batter and then into hot oil. When they are golden turn them over and fry on other side. Remove to a paper towel with a slotted spoon. Cook them in batches so you don't overcrowd pan. Keep them warm as they are cooked by placing them in a 200 degree F. oven.
Top with pico de gallo salsa* and serve immediately.
For the Pico de Gallo
1/2 small white or red onion or 8 slender scallions finely chopped, rinsed, and drained
2 tablespoons fresh lime juice
2 large ripe tomatoes, seeded, if desired, and finely diced
1/4-1/2 cup chopped fresh cilantro (leaves and tender stems)
1-2 jalapeño peppers, seeded and minced
1 medium garlic clove minced
1 tablespoon balsamic vinegar
1/4 teaspoon salt, or to taste
Combine all ingredients.
Photo by mkorcuska on Flickr
Monday, March 28, 2011
Menu Monday: Spring Lunch Menu
The perfect menu for this week! In most locales, it's still too cold (and damp) to go out for a picnic lunch, so stay warm and dry with this menu that perfectly combines cozy comfort food with light spring flavors! Don't forget, Orange and Lemon Day is on Thursday so be sure to try out these delicious biscotti!
Salmon Chowder, garnish with a lemon wedge and fresh parsley.
Monte Cristo Sandwich, serve with a dusting of confectioner's sugar and a dollop of blackberry jam.
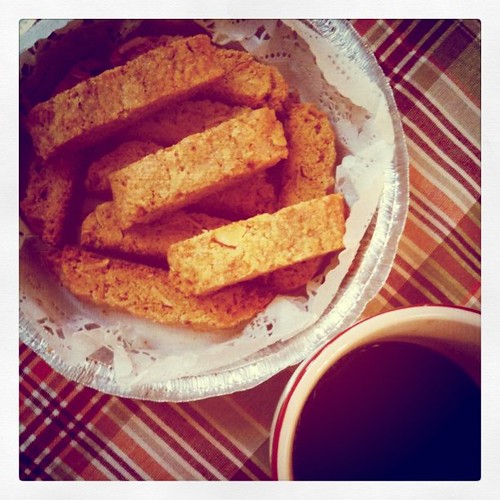
Orange Pecan Biscotti - especially excellent served with tea.
Photo by truk on Flickr
Saturday, March 26, 2011
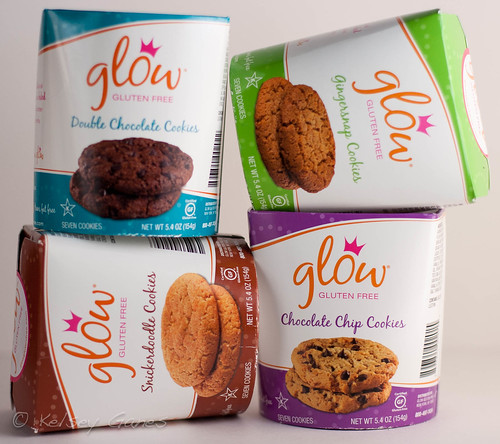
Product Review: Glow Gluten Free Cookies
Ingredients by Cookie
Chocolate Chip
Garbanzo & Fava Bean Flour, Brown Sugar, Semi-Sweet Chocolate (Sugar, Chocolate Liquor, Cocoa Butter, Dextrose, Soy Lecithin, Vanilla), Organic Palm Oil, Organic Evaporated Cane Juice, Eggs, Xanthan Gum, Pure Vanilla Extract, Sea Salt, Baking Soda. Contains Eggs, Soy Lecithin.
Double-Chocolate Chip
Garbanzo & Fava Bean Flour, Brown Sugar, Organic Palm Oil, Semi-Sweet Chocolate (Sugar, Chocolate Liquor, Cocoa Butter, Dextrose, Soy Lecithin, Vanilla), Organic Evaporated Cane Juice, Eggs, Natural Cocoa, Organic Coconut Flour, Coffee, Baking Soda, Sea Salt, Xanthan Gum, Pure Vanilla and Chocolate Extract. Contains Eggs, Soy Lecithim, Tree Nuts.
Gingersnap
Garbanzo & Fava Bean Flour, Organic Evaporated Cane Juice, Organic Palm Oil, Molasses, Eggs, Ground Ginger, Cinnamon, Cloves, Xanthan Gum, Sea Salt, Baking Soda, Pure Vanilla Extract, Natural Coffee Extract. Contains Eggs.
Snickerdoodle
Garbanzo & Fava Bean Flour, Organic Evaporated Cane Juice, Organic Palm Oil, Eggs, Cinnamon, Xanthan Gum, Pure Vanilla Extract, Sea Salt, Baking Soda, Cream of Tartar. Contains Eggs.
Overall Rating - 4.5/5 Stars
These cookies are perfect for dunking - like a gluten free version of Chips Ahoy (yum!)
Taste
Becky: A blast from the past for a moment, please - my mother places before me a saucer holding three gingery snaps and a delicate teacup filled with piping hot lemon curd, homemade from lemons she's squeezed herself. My five-year-old fingers tenderly dip a cookie into the pudding, and together they form the perfect mouthful - the resounding "bite" of ginger, the zing of lemon, and the over-riding sweetness of both. Yes, Glow Gluten Free Gingersnaps are this delicious, and I admit I purchased a box of lemon meringue pie filling in an attempt to recreate my childhood passion. And it was heaven! The Double Chocolate Cookies didn't disappoint (make-your-own ice cream sandwiches, anyone?), and the Snickerdoodles were great, too. The cookies are made with garbanzo bean flavor, and while one really can't tell, if you are really looking for it the taste is there. But honestly, it's not a biggy for these - all three flavors are good, and certainly better than many of the gf cookies out there right now.
Kelsey: The chocolate chip is just what I remember from childhood school lunches; the gingersnaps are gingery (although they could maybe use some more snap...); the double chocolate is chocolatey without being too sweet and the Snickerdoodle - while admittedly, not my favorite - was cinnamon, spice and everything nice. For being made with both garbanzo and fava flour - notorious for their notable aftertaste - these cookies are totally delicious and the only way you could tell is if you're reading the nutrition info.
Texture
Becky: These are not soft-baked cookies. They're crisp yet tender, and not at all hard as rocks as some gf cookies are. The crumb is delicate, but the cookies hold up well to dunking - in both milk AND hot lemon pudding. The Double Chocolate cookies have little chocolate chunks in them that melt away and coat the tongue - a nice textural addition for certain! Overall the texture for all three flavors was exactly like non-gf cookies, and honestly, I think no one would know the difference if these showed up on a dessert buffet or after school snack table!
Kelsey: Crunchy without being teeth-shattering, like a grown-up version of my favorite childhood snacks. The gingersnaps are the most texture-flavor appropriate, but aside from the Snickerdoodles - a flavor which should only be served soft-baked - the texture is perfect.
Storage
Becky: The seven cookies come in an adorable Chinese food container, with colorful labels and a cheerful logo. Storage is easy if more than one flavor is in your pantry or cupboard because they stack easily. Inside is a sheer plastic wrapper that keeps them extra fresh. I feel I must make a guilty admission here - I opened the three containers when they arrived and had a cookie from each (with a huge glass of milk), and then hastily wrapped them in their inner wrappers and tossed them into the freezer until review time. I certainly had my doubts about the freshness of the cookies, but guess what? After thawing on the counter overnight, the remaining cookies were fresh as could be, unbelievably tasty as I'd remembered, and impressively unspoiled in every way. Who can argue with that?!
Kelsey: The most darling packaging ever! The cookies are wrapped in cellophane and boxed up in an adorable Chinese food-style container. The bright colors, cute logo and - here's the best part - AD LIBS on the back! That's right, delicious cookies AND fun in every box. What's not to love?
Availability
Becky: Widely available in the U.S and Puerto Rico, although not all of the "50 nifty" yet. I suspect this is rapidly changing, but until they're available in your local area, you can find Glow Gluten Free cookies at www.glutenfree.com as well. I was pleased to find 5 retailers local to me - a miracle in my very rural area, so keep your eyes peeled for these in your town, too. And until then, I'll just sit here with my milk and cookies and glow(t)...
Kelsey: Surprisingly, there is only one retailer identified by their store locator in Washington State. That being said - at least it's available in person! Always available online, these cookies are (so I hope) spreading like wildfire to nearby markets and grocers.
Cost
Becky: Not a budget-breaker at about $5.50 per box. There are seven very large cookies in each container, and one cookie is pretty filling, so they're certainly worth the money. That's about seventy cents per cookie, and given the cost of the high quality ingredients, I'd say this is a decent buy. Don't forget to add in shipping costs if you're ordering from the website!
Kelsey: Not a bad price point at $5.50/box, but for only 7 3-inch cookies - delicious, satisfying cookies - they're still a little steep. Worth it for these delectable dunkers, but maybe as more of a special cookie than an everyday lunch box sort of thing.
Thursday, March 24, 2011
Thirsty Thursday: Fruit Smoothies Perfect for Spring
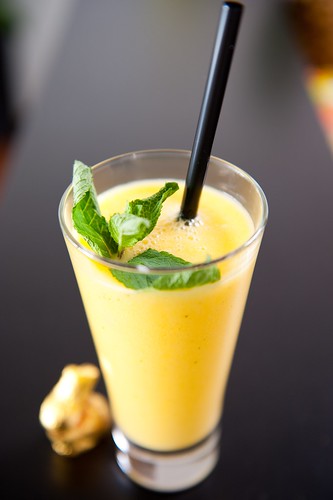
For many of us it is often hard to find the time to make time to make a nutritious breakfast in the morning. One great option is to whip up a quick, fruit packed smoothie. Smoothies are delicious, quick and provide a full serving of fruits (and vegetables, if you choose to include them) in one simple glass. All you really need is a blender and an assortment of fruit and you are in smoothie business!
Great tips for getting the most out of your smoothies
Keep an assortment of frozen fruit on hand in the freezer for smoothies. Frozen fruit is perfect for smoothies because it gives it a thicker texture, plus it is keeps for a long time and sometimes you just don’t always have fresh fruit on hand.
For added nutritional punch you can also add in flax or a gluten-free protein powder as well. Add in some carrots or even some spinach for some additional sweetness and added nutrients. This month we created several delicious fruit smoothies that will surely brighten your early spring mornings. This delicious drink also makes a great snack (my daughter often prepares them for herself after school).
Black & Blue Smoothies
(serves 2)
1/2 cup blackberries
1/2 cup blueberries
1/4 cup blueberry pomegranate juice
1/4 cup orange juice
1 Tablespoon honey
1-1/2 cups crushed ice
Place all ingredients in a blender and process until smooth. Note: you can also use frozen blueberries and blackberries in this recipe. If you choose frozen fruit cut the crushed ice down by 1/2 cup.
Orange, Pineapple & Coconut Smoothie
(serves 2)
1/2 cup orange juice
1/4 cup fresh pineapple
1/2 banana
1/2 cup plain yogurt
2 Tablespoons shredded coconut
1-1/2 cup crushed ice
Place all ingredients in a blender and process until smooth. Note: you can also use frozen fruit in this recipe. If you choose frozen fruit cut the crushed ice down by 1/2 cup.
Mixed Berry & Banana Smoothie
(serves 2)
1/2 cup raspberries
1/2 cup strawberries
1 banana
1/2 cup yogurt
1/2 cup milk
1 Tablespoon honey (or more to taste)
1/2 cup crushed ice
Place all ingredients in a blender and process until smooth. Note: you can also use frozen fruit in this recipe. If you choose frozen fruit cut the crushed ice down by 1/2 cup.
Photo by realSMILEY
Wednesday, March 23, 2011
GFCF Weekly Roundup: Lemon Polenta Cake
In honor of Oranges and Lemons Day next week (March 30th), I thought this would be the perfect recipe to feature! The whole thing comes together really quickly and the bake-time rivals a pan of brownies. Polenta, reconfigured as grits in the South, comes in both an instant and original varieties.
GFCF Lemon Polenta Cake
Ingredients
2 cups gluten free flour
1/4 cup polenta (coarse ground cornmeal)
1 teaspoon baking soda
1/2 teaspoon baking powder
1/2 teaspoon salt
1/2 cup vegetable oil
2 Tablespoons fresh lemon juice
1 Tablespoon vanilla extract
2 large eggs
1 cup sugar
1 Tablespoon lime zest
Powdered sugar
Directions
Preheat oven to 325°F. Butter a 9" springform pan on the bottom and sides.
In a medium bowl, combine gluten free flour, polenta, baking soda, baking powder and salt. In a small, separate bowl, combine oil, lemon juice and vanilla extract. In a large bowl, beat eggs with sugar on medium speed until thick, about 3-4 minutes. Gradually beat in oil mixture and lime zest. Gently fold in dry ingredients until just blended.
Scrape batter into prepared springform pan. Bake for about 50 minutes or until center springs back when lightly pressed. Let cake cool on a wire rack for 5 minutes. Release cake from spring form pan and let cool completely. Cut into wedges and dust with powdered sugar.
Photo by avlyxyz on Flickr.
Tuesday, March 22, 2011
Recipe of the week: Beets with Mixed Greens
This week's recipe features fresh beets - still available at farmer's markets across the nation at the tail end of their season. Because they are root vegetables, it is pretty important that they are organic -- they are definitely on the Dirty Dozen list. To add a little bit of interest, feel free to use golden beets instead of, or in addition to, standard beets - they are much less messy, guaranteed not to stain your tablecloth and hands and hardly taste any different. Now the recipe calls for boiling the beets, but I'm a big fan of roasting - so if you have some extra time, I would recommend trimming off the greens (set aside to use later!)
Beets with Mixed Greens
Ingredients
2 beets (preferably organic)
1 carrot, peeled and sliced thin
1/4 cup English cucumber, peeled and sliced thin
2 Tablespoons thinly sliced red onion
6 cups mixed greens
1 Tablespoon balsamic vinegar
3 Tablespoons extra virgin olive oil
1 teaspoon pure maple syrup
1/4 teaspoon stone ground mustard
Salt and freshly ground black pepper
1 oz thinly sliced aged Gouda cheese
Directions
Cut the stem and leaves off the beets and quarter. Place beets in a saucepan and cover with water. Bring to a boil; reduce heat and simmer until tender, about 20 minutes. Remove beets from water and let cool. When cool enough to handle, slice.
Meanwhile, place carrots, cucumbers, red onion and mixed greens in a large salad bowl. Set aside.
In a small bowl, whisk together the balsamic vinegar, olive oil, maple syrup, and stone ground mustard. Season to taste with salt and freshly ground black pepper.
Add cooled, sliced beets to salad and drizzle half the dressing over the top and toss. Leaves should be just nicely coated with dressing, not drenched. Add more dressing if need be.
Divide salad among 6 salad plates and top with aged Gouda slices. Serve immediately.
Photo by Ralph Daily
Monday, March 21, 2011
Menu Monday: Early Spring Casual Entertaining Meal
This menu highlights the incoming warmer weather and fresh produce hitting grocery stores and farmers markets across the country. This meal is elegant and can be at least partially prepared ahead of time - definitely the endive appetizer and asparagus salad. The meal is light and fresh, but still hearty and sophisticated. Omit the steak and you can have a tapas-style picnic lunch for some al fresco dining!
Early Spring Casual Entertaining Meal
Smoked Salmon Stuffed Endive
Asparagus Salad with Toasted Walnuts
Potato Galette
Steaks with Shallots & Madeira
Marinated Strawberries with Sweet Mascarpone Bruschetta
Grilled Asparagus Image by Missy and the Universe on Flickr.
Friday, March 18, 2011
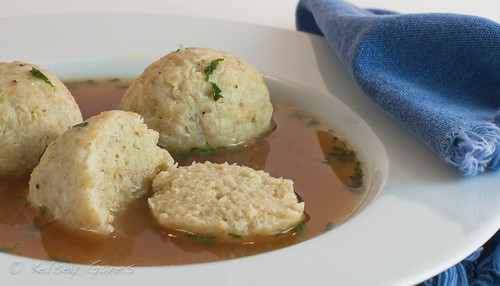
Product Review - Eena Kadeena Mock-Zah Ball Mix
Produced by Eena Kadeena, LLC.
2095 NW Aloclek Dr.
Suite 1114
Hillsboro, OR 97124
Tel. (503) 705-3007
info@eenakadeena.com
Twitter @eenakadeena // on Facebook
Ingredients
Organic quinoa flakes, organic potato flakes, dehydrated onion, salt, organic dehydrated garlic, guar gum, vegetable mono diglycerides, black pepper.
Overall Rating - 5/5 Stars
With Passover coming up, keep these in mind! They are sure to be crowd pleasers and make for a gluten-friendly holiday for everyone. Not traditional, but allergy friendly - I'm down.
Taste
Becky: Delicious. Period. Okay, not really, because I'm not known to be a woman of few words, and leaving my review at "delicious" just wouldn't cut it where Mock-Zah Balls are concerned! I do believe that this will be the first time my review will be an unqualified, no-questions-left-to-ask "Five Stars." I'm not Jewish, and matzah balls have never been in my culinary repertoire, so this was a whole new world for me. My only experience with matzah balls was when I was very young, and I just don't remember anything spectacular about them. That all changed when I made them from this mix. These are truly wonderful - tasty on their own (yes, I ate two right out of the pot), and even more so after dropping into my homemade chicken soup. I will add these to my grocery list from now on because they are... I'm repeating myself... DELICIOUS!
Kelsey: I was actually rendered speechless by these little pockets of perfection. Really and truly! I was incredibly skeptical after the "dump everything in a bowl and combine" instructions, and when the balls floated to the surface of the boiling water only a minute after I first submerged them, I feared for the worst: "25 more minutes? Are they nuts?" But as with every product review, I always follow the instructions to the letter - and were my (non)efforts rewarded! This mix came together so easily, the most difficult part was waiting while the mix chilled in the refrigerator and boiled merrily on the stovetop! They were perfect - better than the "real deal", if you ask me. Perfectly seasoned (not too salty, just enough garlic and spices to taste like they have been simmering in Bubbe's chicken soup all day!), they soak up just enough broth to taste like whatever soup you're serving them in without becoming flavorless themselves - so perfect!
Texture
Becky: It's hard to be critical when something is as tasty as these are! The texture is NORMAL. Yep - totally, utterly, dumpling-y NORMAL! Perfectly chewy and full of the broth flavor of my soup on the outside, tender and flavorful on their own inside. There's nothing more to say here except "perfection".
Kelsey: I swear, better than their gluten-filled counterparts! Not in the least bit dry or mealy, the quinoa and potato flakes combined into the dynamic duo of deliciousness! They weren't gummy or soggy or chewy or crumbly or anything less than unbelievable! Now, I didn't finish all of mine in a single batch, so I took one of the dozen or so that wound up in a tupperware container in the refrigerator and ate it. Cold. Standing right in front of the fridge, door open. It was amazing. They were still moist, 36 hours later in a container that, admittedly, does not seal very well (I'm a broke post-grad, ok?!) and they were still perfect. How do you top that?!
Storage
Becky: This is the most gorgeous, space-saving packaging I've ever seen. There's little waste here - the box is small - about the size of a box of tea - , and I actually held a nagging doubt that there was enough mix in the box to be worth it. There is, and the box is so pretty I might just want to store it on the counter! Inside is a clear plastic liner that I really like - easy to see exactly what I'm getting in that pretty box, and such thin plastic that there's little waste inside the box, too.
Kelsey: Cutest. Packaging. Ever. "Mock-Zah Balls" and "'Chai' our pancakes" - stylish design, conveniently sized box, trendy colors and punny titles - love it!
Cost
Becky: On the Eena Kadeen website this mix sells for $7.95 - not out of the realm of realistic for such a high-quality gluten free product, and I will certainly be purchasing these to have on hand. Also, from what I can glean about the making of gluten-rich matzah balls, the simplicity of making these in comparison makes the cost well worthwhile. I hope the price doesn't go any higher, though - that might put them into the category of "special events food," instead of the category they belong in for me: "staple".
Kelsey: AMEN.
Availability
The Mock-Zah Ball mix, along with a range of other gluten free mixes, is available on the Eena Kadeena website for now. Those living in California, Washington state, and Oregon will find the mixes in a small handful of stores as well. I still give this a five star rating because the web ordering through the company is so safe and easy, and also given the number of people who own computers on which to do their ordering!
Thursday, March 17, 2011
St. Patrick's Day Recipe Roundup
Because no food-related holiday is complete without a recipe roundup! Here are a few of our favorite St. Patrick's Day appropriate recipes - including a different take on the traditional corned beef brisket!
- Orange Marmalade Glazed Corned Beef
- Champ (mashed potatoes with green onions)
- Hot Cabbage & Cranberry Salad
- St. Patrick's Day Milkshakes
Wednesday, March 16, 2011
GFCF Weekly Roundup: WAFFLES
That's right, WAFFLES - in all caps. I love waffles; I miss waffles; and with this allergy friendly recipe, now they can be enjoyed by everyone around.
Gluten free, Dairy/Casein free Waffles with Berry Syrup
Ingredients
For the waffles
1-3/4 cups gluten free flour (like Jules All-Purpose)
1 Tablespoon baking powder
1/4 teaspoon baking soda
1 Tablespoon sugar
1/2 teaspoon salt
3 large eggs, lightly beaten
6 Tablespoons Earth Balance butter, melted
2 Tablespoons canola oil
1-1/2 cups soymilk up to 1/2 cup water (to thin batter, if needed)
For the syrup
1-1/2 cups frozen blueberries
1-1/2 cups frozen unsweetened raspberries
1/2 cup pure maple syrup
1/4 teaspoon ground cinnamon
Directions
For the Waffles
Preheat a waffle iron.
In a large bowl, combine the gluten free flour, baking powder, baking soda, sugar, and salt. In a separate bowl, combine the eggs, melted Earth Balance butter, canola oil and soy milk. Make a well in the center of the dry ingredients and pour in the wet ingredients. Mix until the mixture is just combined. (If the batter is too thick, thin with a little water. You may need to thin the batter between waffles - it tends to thicken as it sits.)
Spoon 1/2 cup of the batter onto the hot waffle iron. Close the lid and bake until the waffle is golden or the waffle iron indicates it is ready. Repeat process with remaining batter.
For the Syrup
While waffles are cooking, combine the berries, maple syrup and cinnamon in a saucepan. Cook over medium heat until thoroughly heated and some of the berries have broken down. Serve syrup over waffles.
Perfect for breakfast in bed or a weekend brunch, these gluten-free and dairy-free waffles are a crowd pleaser. Even though berry season is still a few months away, the beauty of this recipe is that it works best with frozen fruit! While dairy free pancake and waffle recipes are easier and easier to come by, they don't always make for the most traditional-style breakfast - but not these! While they are deliciously GFCF, these waffles will bring back memories of your favorite weekend brunches. No matter what time of year, these waffles will make you feel like spring is right around the corner!
Gluten free, Dairy/Casein free Waffles with Berry Syrup
Ingredients
For the waffles
1-3/4 cups gluten free flour (like Jules All-Purpose)
1 Tablespoon baking powder
1/4 teaspoon baking soda
1 Tablespoon sugar
1/2 teaspoon salt
3 large eggs, lightly beaten
6 Tablespoons Earth Balance butter, melted
2 Tablespoons canola oil
1-1/2 cups soymilk up to 1/2 cup water (to thin batter, if needed)
For the syrup
1-1/2 cups frozen blueberries
1-1/2 cups frozen unsweetened raspberries
1/2 cup pure maple syrup
1/4 teaspoon ground cinnamon
Directions
For the Waffles
Preheat a waffle iron.
In a large bowl, combine the gluten free flour, baking powder, baking soda, sugar, and salt. In a separate bowl, combine the eggs, melted Earth Balance butter, canola oil and soy milk. Make a well in the center of the dry ingredients and pour in the wet ingredients. Mix until the mixture is just combined. (If the batter is too thick, thin with a little water. You may need to thin the batter between waffles - it tends to thicken as it sits.)
Spoon 1/2 cup of the batter onto the hot waffle iron. Close the lid and bake until the waffle is golden or the waffle iron indicates it is ready. Repeat process with remaining batter.
For the Syrup
While waffles are cooking, combine the berries, maple syrup and cinnamon in a saucepan. Cook over medium heat until thoroughly heated and some of the berries have broken down. Serve syrup over waffles.
Tuesday, March 15, 2011
Recipe of the Week: Pasta with Tuna, Capers & Golden Raisins
I know what you're thinking: "Capers and raisins? I'm all for sweet & sour, but this seems a little much..." and that's where you're wrong! Give it a shot; I know pickled flower buds and dehydrated grapes sound like unlikely bedfellows, but this recipe is perfectly unusual - maybe our first foray into the world of flavor-based gastronomy? Bon appetit!
Ingredients
Prepare the tuna
2/3 cup sake
1/4 cup gluten free soy sauce/tamari
1 Tablespoon fish sauce
1 teaspoon red wine vinegar
1 Tablespoon ketchup
1 teaspoon sugar
1 tuna steak
For the pasta
1 cup asparagus tips (2 inch pieces)
1 lb. dried gluten free pasta (we recommend Bi-Aglut/Le Veneziane or Orgran pastas)
2 Tablespoons extra virgin olive oil
1 leek, tender green and white parts only, chopped
2 garlic cloves, minced
1/4 teaspoon freshly ground black pepper
2 Tablespoons drained, bottled capers
1/2 cup golden raisins
1/4 cup Italian parsley, chopped
Directions
First, prepare the tuna by placing the sake, gluten free soy sauce, fish sauce, red wine vinegar, ketchup and sugar in a large zip lock bag. Add the tuna steak, seal and turn to coat. Let marinate in the refrigerator for 30 minutes.
Prepare a grill. Remove the tuna from the marinade (discard marinade). Grill the tuna for 3-5 minutes per side. Cut into large chunks and set aside.
Meanwhile, bring a large pot of salted water to a boil. Add the asparagus tips and cook until just tender, about 3 minutes. Using a slotted spoon remove the asparagus tips from the water and immediately plunge into a bowl of ice water. Add the pasta to the water and cook until al dente. Reserve 1 cup of pasta cooking water then drain pasta and return to the pot.
While the pasta cooks, heat the oil in a large skillet over medium high heat. Add the onions and garlic; cook until tender and golden, about 6-8 minutes. Stir in the capers, raisins, parsley and reserved cooking water. Add the mixture to the pasta along with the grilled tuna and toss to combine. Season with freshly ground black pepper. Serve immediately.
Saturday, March 12, 2011
Product Review: Feel Good Foods' Asian-Style Dumplings
Ingredients
Dipping Sauce
Low Sodium Wheat Free Tamari (water, organic soybeans, salt, organic vinegar), sugar, white vinegar, ginger, garlic, and ground black pepper.
Wrapper sweet rice flour, water, potato starch, rice flour, soybean oil, salt, xanthan gum, corn starch.
Chicken Dumplings
Filling chicken, cabbage, sesame oil, green onion, sugar, salt, garlic, ginger, cilantro, yeast extract, black pepper
Pork Dumplings
Filling cabbage, pork, potato starch, water, sugar, green onion, garlic, ginger, corn/soy bean oil, sesame seed oil, salt, yeast extract, black pepper
Shrimp Dumplings
Filling Shrimp, cilantro, carrot, green onion, ginger, sesame oil, sugar, salt, garlic, yeast extract, black pepper
Vegetable Dumplings
Filling Cabbage, yellow onion, vermicelli (pea, mung bean, corn starch, water) carrot, green onion, corn starch, sesame oil, dry shiitake mushroom, sugar, salt, yeast extract, ginger, black pepper
Overall Rating - 4.5 out of 5
Kelsey: While the cooking instructions are very particular (and must be followed to the letter) and they retail for ~$8.00/box, these are much easier and tastier than any homemade gluten-free potsticker/dumpling/gyoza I've had in the past 8 years!
Taste
Becky: So out of the four flavors of these potstickers (chicken, pork, vegetable, and shrimp) I first chose to cook the chicken and shrimp for a seafood-loving (and non-gluten-free) friend, and my extremely picky gluten free daughter. We sat down together to have these as our meal, along with some homemade fried rice as an accompaniment. WOW! These dumplings are delicious: full flavored, savory and tasty, and oh-so-Chinese-food-satisfying! The dipping sauce that's included is gluten free and perfect - when I warmed it up a bit, it was just like the sauce that comes from the Chinese restaurant, minus the little plastic container. We decided to cook the pork and vegetable flavors the following night, and we were equally satisfied with these. To pick a favorite flavor would be impossible - they're all delicious, and would be a terrific appetizer or hors d'oeuvre to serve for guests. Not only will no one know they're gluten free, they won't care: these are worth the effort! Besides, you could tell a little white lie and say they're homemade!!!! Five stars!
Kelsey: Three words: oh my gosh. These potstickers/dumplings are delightful! They come in four flavors (Chicken, Pork, Shrimp and Vegetable) but due to a very severe shellfish allergy, I could not try the shrimp - but the other three were fantastic! The chicken was my personal favorite, but it was a tough contest to be sure. The vegetable was a little cabbage-heavy and tended to be the most delicate in terms of holding its shape, but they were all DELICIOUS! 5 stars!!!
Texture
Becky: Once I got the directions down pat, the texture of these was wonderful - soft and chewy melded with just enough crispy counterpoint to feel like a dumpling just prepared and served at a restaurant or dim sum bar. The key is to follow the directions to the letter - in my excitement to eat, I plopped the dumplings into a cold pan of water and oil, and the first three were a disaster, literally dissolving before my eyes. But once I actually slowed down and read the box, the dumplings that came out of the pan were cooked perfectly. Given the sensitivity of the directions, one needs to keep an eye on these so the texture isn't crumbly or falling apart. But OH, the perfect yumminess of these once I got the hang of it! Without reservation, five big ol' stars! BC
Kelsey: Aside from some minor melting issues with the vegetable variety (probably because I added too much water -oops!), they steamed up perfectly and fried up in a minute without any added oil, becoming the perfect combination of crispy-crunchy and soft'n'chewy. It IS incredibly important to follow the directions to. the. letter., otherwise you end up with a mushy dissolving mess - but really, for all of their specific instructions, these dumplings are so worth it! Be really careful though, the "non-stick pan" part is crucial to proper texture! 5 stars!
Storage
Becky: My potstickers arrived on dry ice, and they need to remain frozen right up to the point of putting them in the pan. This was how I achieved the best results in cooking them. The box is small, and holds 8 dumplings plus sauce, and the four boxes I was sent were perfect to fit into my already crowded freezer. I wonder, though, how long I'd actually need to store them, since they disappeared the night after they arrived! Five stars!
Kelsey: The boxes are petite, smaller than most frozen meals and hold 8 dumplings + sauce packet. They store beautifully in the freezer, but it's really important to keep them frozen until you begin cooking (again, from frozen) - the product itself is raw and defrosting could pose some unpleasantness. Five stars.
Cost
Becky: Yeah, well - these are pricey little packages of heaven, so watch out for the sticker shock. But I'll qualify that by saying that for a real treat, and worth every penny, the flavor and ultimate satisfaction far outweigh the price per dumpling. On the Gluten Free Mall the price is over $8 per box, and then one needs to allow for shipping costs on top of that, so with 8 dumplings per box these are well over $1.00 per dumpling. I say they're worth the splurge because two boxes are a filling meal for three hungry people, so when that's totaled up, the cost is far less than a take-out meal. AND it's totally and safely gluten free! Four stars.
Kelsey: I'll be honest, at over $1 per dumpling I was a little bit skeptical, but really, they are so worth it. Even when we used to be able to go out for dim sum, it would cost just as much (and you had to deal with chicken feet...) and, obviously, was not gluten free. While the sticker price may first seem a little ridiculous, keep in mind the price of take out and remember that you can't put a price on peace of mind... right?
Availability
Because this is a new product, word is only just beginning to spread. This New York City-based company has just started distribution on the Gluten Free Mall, and is also branching out to health food and gourmet markets in the Northeast and eastern Mid-West. I imagine shipping will cause a problem with distribution, since the potstickers need to stay frozen, but I'm keeping my fingers crossed that this hurdle is an easy one to get over, because these are worth it! 3.5 Stars!
Subscribe to:
Posts (Atom)